
VNX SP Collect 는 CLI, GUI 둘다 가능
Support material은 CLI -> Winscp로만 수집 가능
- SP Collect CLI, GUI
- VNX SP Collect CLI
IP연결 후 CMD창에서
로그 수집 명령어
ㄴ naviseccli –h <SP A,B IP Address> –user <user> –password <password> –scope 0 spcollect -messner
로그 Zip파일 생성 확인 리스트 조회 명령어
ㄴ naviseccli –h <SP A,B IP Address> –user <user> –password <password> –scope 0 managefiles -list | findstr -i [검색할 날짜]
ㄴ .runlog로 끝나는 파일일 경우 SP Collect가 아직 진행중인 상태

ㄴ 해당 날짜로 _data.zip파일이 생성되었으면 완료된 것

Zip파일을 내컴퓨터로 복사하는 명령어
1. naviseccli –h <SP A,B IP Address> –user <user> –password <password> –scope 0 managefiles -retrieve
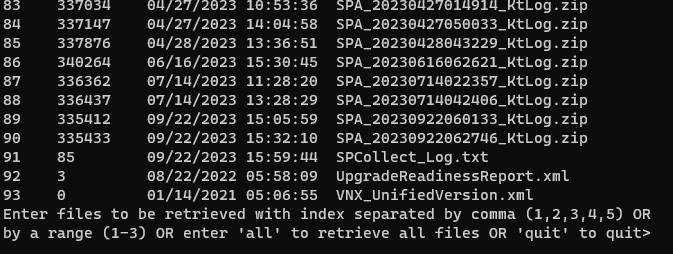
복사 할 파일 번호를 입력한다.
2. 파일 번호를 입력하면 해당 파일의 파일명이 나오고 y를 누르면 성공

3. 해당 폴더에서 찾을 수 있다.

- VNX SP Collect GUI
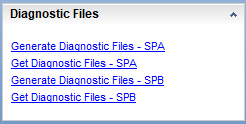
1. 해당 장비의 IP로 GUI 접속 후 오른쪽 메뉴 중 Diagnostic Files 메뉴의 Generate Diagnostic Files -SPA or SPB를 클릭한다.
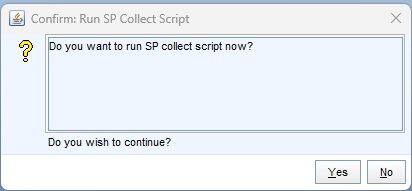
2. yes를 클릭하면 Success의 알림이 오고 SP Collect 진행

3. 상기의 Diagnostic Files메뉴에서 Get Diagnostic Files -SPA or SPB를 클릭하여 접속한다
ㄴ 접속한 후 log를 확인해보면 진행중일 경우 _runlog.text라고 표기가 되고 완료가 되면 _data.zip으로 표기가 된다.

4. 수집이 끝난 후 해당 파일을 선택한 후 Transfer 클릭 후, YES 클릭 -> OK 클릭
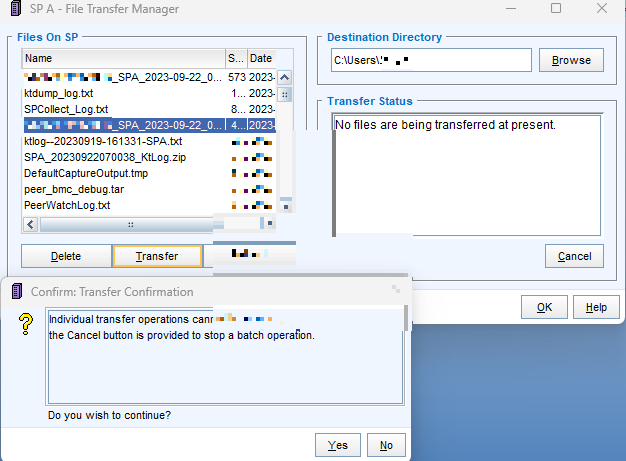
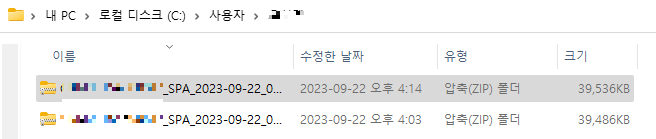
5. 상기 폴더에 하나가 더 추가됨을 확인 할 수 있다.
'IT' 카테고리의 다른 글
| Dell Unity dc log 수집 (0) | 2024.01.19 |
|---|---|
| Dell VNX Support material 수집 / File log 수집 (0) | 2024.01.18 |
| Dell VNX 장비연결 방법 Management Port / Service Port / GUI (0) | 2024.01.16 |
| Dell Unity Led 상태 확인 / LED점검 (0) | 2024.01.15 |
| Dell Unity 장비연결 방법 Management Port / Service Port / GUI (0) | 2024.01.14 |


